
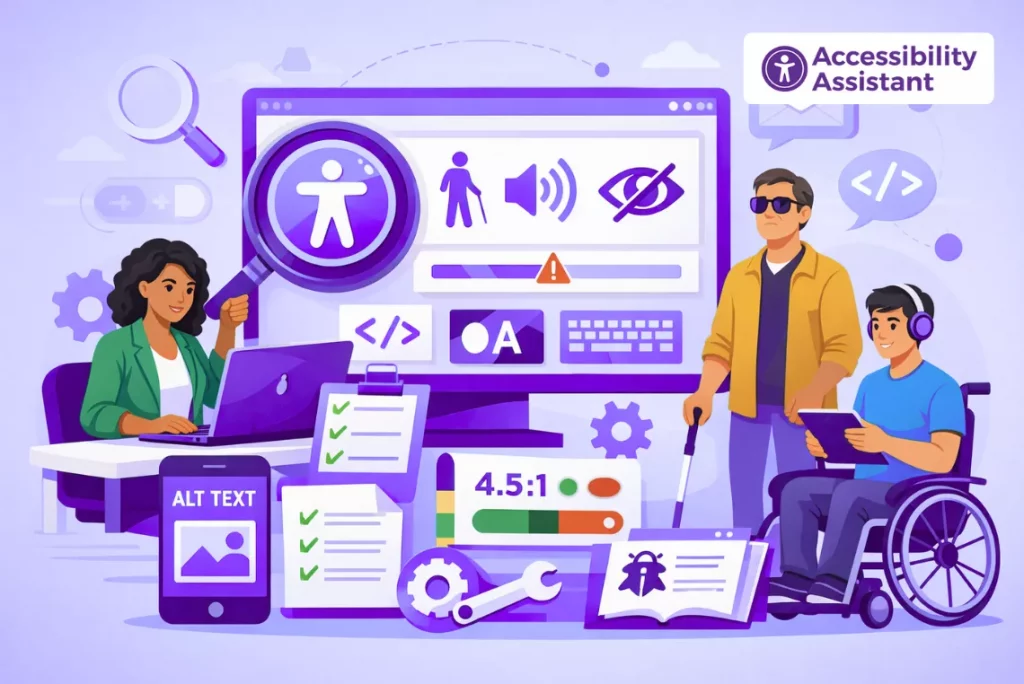
Knowing how to check the accessibility of a website is no longer optional for modern businesses. Websites are expected to work for everyone, including people with disabilities who rely on keyboards, screen readers, voice input, or other assistive technologies. Yet many websites fail accessibility checks simply because teams do not know what to test, how to test it, or how often testing should happen.
Accessibility issues rarely appear obvious at first glance. A website can look visually appealing and still be unusable for someone who cannot use a mouse, see low-contrast text, or understand unclear form errors. That is why accessibility checking requires more than a quick scan or a single tool.
This guide explains how to check accessibility of your website step by step, which website accessibility audit tools to use, how to check accessibility compliance, and how to turn findings into meaningful improvements. It is written for business owners, designers, developers, marketers, and product teams who want reliable, repeatable accessibility checks without unnecessary complexity.
What Does It Mean to Check Website Accessibility?
Checking website accessibility means identifying barriers that prevent people with disabilities from accessing, understanding, or interacting with your content. These barriers can affect:
- Navigation
- Reading and comprehension
- Form completion
- Media playback
- Mobile usability
Accessibility checks focus on how real users interact with your website using different tools and input methods.
Accessibility checking usually involves three layers:
- Automated testing to catch obvious issues
- Manual testing to validate usability
- Assistive technology testing to simulate real user experiences
No single method is enough on its own.
When Should You Check Your Website for Accessibility Issues?
Many teams wait until a complaint or audit request appears. That is often too late. Accessibility checks should happen at multiple points.
You should check website accessibility:
- Before launching a new website
- After a redesign or theme update
- After adding new content or features
- Before a compliance or client audit
- On a regular schedule for active websites
Frequent updates increase the risk of accessibility regression. Even small changes—like new banners, color adjustments, or form updates—can introduce barriers.
Step-by-Step: How to Check Accessibility of a Website
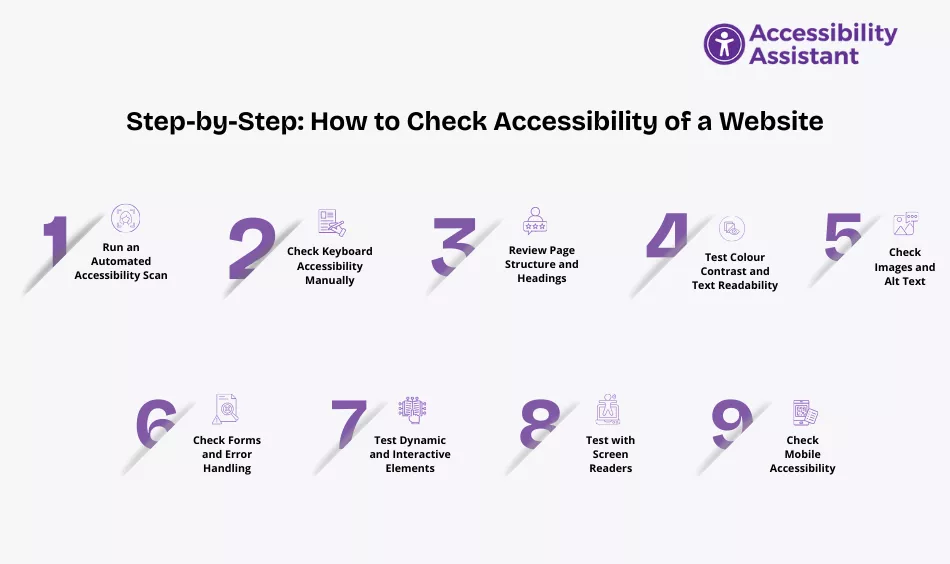
The most effective approach combines tools and hands-on testing.
Step 1 — Run an Automated Accessibility Scan
Automated scans are the fastest way to identify common issues.
Automated tools can detect:
- Missing alt text
- Low color contrast
- Empty buttons or links
- Missing form labels
- Structural issues like missing landmarks
These tools provide a starting point, not a final answer. Most automated tests detect only a portion of real accessibility problems.
If you want a fast, no-setup starting point, you can use a free accessibility scan to get an immediate overview of common issues and risk areas:
This type of scan is useful for identifying high-impact problems quickly and prioritizing next steps.
Step 2 — Check Keyboard Accessibility Manually
Keyboard testing reveals issues automated tools often miss.
How to test:
- Use Tab and Shift + Tab to move through the page
- Use Enter and Space to activate elements
- Use Escape to close menus or pop-ups
What to look for:
- Can you reach every interactive element?
- Is the focus order logical?
- Is the focus indicator clearly visible?
- Do menus, forms, and dialogs work without a mouse?
If you get stuck or lose focus, you’ve found an accessibility issue.
Step 3 — Review Page Structure and Headings
Structure plays a major role in accessibility.
Check that:
- Each page has one clear main heading
- Headings follow a logical order
- Content is grouped meaningfully
- Navigation and main content are clearly separated
Screen reader users rely heavily on headings to move through content. Poor structure makes navigation slow and confusing.
Step 4 — Test Colour Contrast and Text Readability
Low contrast is one of the most common accessibility failures.
Check:
- Body text against background colors
- Buttons and links
- Error messages
- Focus outlines
- Light mode and dark mode themes
Text should remain readable at different sizes and zoom levels. Avoid using color alone to convey meaning, especially for errors or status messages.
Step 5 — Check Images and Alt Text
Images must have appropriate text alternatives.
Review:
- Informative images with meaningful alt text
- Decorative images marked appropriately
- Icons used as buttons or links with clear labels
Alt text should describe the purpose of the image, not just its appearance. Poor or missing alt text prevents screen reader users from understanding content.
Step 6 — Check Forms and Error Handling
Forms are high-risk areas for accessibility issues.
Check that:
- Every input has a visible, associated label
- Instructions are clear
- Required fields are identified properly
- Errors are visible and understandable
- Errors are announced to assistive technologies
- Focus moves to errors when they occur
Accessible forms reduce frustration and increase completion rates for all users.
Step 7 — Test Dynamic and Interactive Elements
Modern websites rely heavily on dynamic components.
Test:
- Dropdown menus
- Accordions
- Modals and pop-ups
- Tabs
- Carousels
Common failures include:
- The focus is not moving correctly
- Keyboard controls are not working
- Screen readers are not being notified of changes
Dynamic elements should behave predictably for all users.
Step 8 — Test with Screen Readers
Screen reader testing provides critical insight.
You don’t need to become an expert. Focus on basic checks:
- Does the content read in the correct order?
- Are headings and landmarks announced properly?
- Are links and buttons descriptive?
- Do form errors make sense when read aloud?
This step often reveals issues that are invisible visually.
Step 9 — Check Mobile Accessibility
Mobile accessibility is essential, not optional.
Check:
- Touch target size
- Zoom support
- Orientation changes
- Focus visibility on mobile
- Consistent behavior across devices
Many accessibility issues only appear on smaller screens.
Once you understand how to identify accessibility issues, the next step is knowing how to fix them correctly. Our step-by-step guide on how to make your website accessible explains practical actions teams can take to improve navigation, readability, forms, and overall usability. Pairing accessibility checks with clear implementation steps helps turn findings into real improvements.
Website Accessibility Audit Tools You Can Use
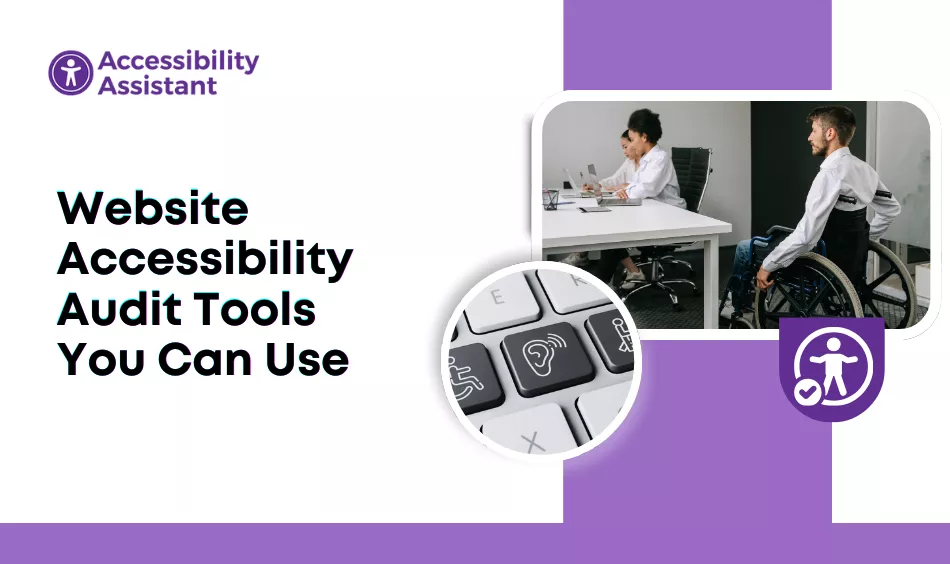
There are many website accessibility audit tools, each serving a different purpose.
Automated Tools
- Browser extensions
- Online scanners
- CI-based testing tools
These are excellent for quick checks and ongoing monitoring.
Manual and Assistive Technology Tools
- Keyboard testing
- Screen readers
- Contrast checkers
Manual testing validates real-world usability.
Accessibility Checks vs Full Accessibility Audits
Quick checks and full audits serve different goals.
Quick checks:
- Identify obvious problems
- Useful during development or content updates
Full audits:
- Include manual and assistive technology testing
- Provide detailed findings and remediation guidance
- Required for formal compliance efforts
Both are important for maintaining accessibility over time.
Common Issues Found When Checking Website Accessibility
Across industries, the same problems appear repeatedly:
- Low color contrast
- Missing alt text
- Keyboard navigation failures
- Poor heading structure
- Inaccessible forms
- Dynamic content not announced
These issues affect usability and compliance regardless of website size or industry.
Accessibility Check Priority Table
The table below helps teams prioritize fixes after checking accessibility.
| Issue Area | User Impact | Priority Level | Typical Effort |
| Keyboard navigation | Blocks access | High | Medium |
| Colour contrast | Limits readability | High | Fast |
| Form labels and errors | Prevents completion | High | Medium |
| Heading structure | Confuses navigation | Medium | Fast |
| Media captions | Limits understanding | Medium | Moderate |
Focusing on high-impact issues first delivers the greatest improvement.
How Often Should You Check Website Accessibility?
Best practices depend on how often your site changes.
General guidance:
- Static sites: check quarterly
- Active sites: check monthly
- After major updates: check immediately
- Before campaigns or launches: always check
Accessibility is not a one-time task.
Simple Accessibility Checking Checklist
Use this checklist during regular reviews:
- Keyboard navigation works everywhere
- Focus is visible and logical
- Text is readable and scalable
- Images have proper alt text
- Forms have labels and clear errors
- Links and buttons are descriptive
- Dynamic content is announced
- Mobile accessibility is verified
Mistakes to Avoid When Checking Accessibility
Common mistakes include:
- Relying only on automated tools
- Ignoring mobile users
- Testing only one page
- Skipping screen reader testing
- Not documenting findings
Accessibility issues often return if fixes are not tracked and validated.
Frequently Asked Questions About Checking Website Accessibility
- How do I run an accessibility check?
To run an accessibility check, start with an automated scan using accessibility testing tools to identify common issues like missing alt text or low colour contrast. Then perform manual checks by testing keyboard navigation, reviewing headings and forms, and verifying focus visibility. For best results, include basic screen reader testing to confirm real user accessibility.
- Can a website be 100% ADA compliant?
In practice, achieving 100% ADA compliance at all times is very difficult because websites constantly change. However, websites can meet WCAG standards at a high level and maintain strong ADA alignment through regular testing, prompt fixes, and continuous monitoring. Compliance is an ongoing process, not a one-time state.
- How do I check if something is screen reader-friendly?
To check if content is screen reader-friendly, use a screen reader and navigate the page using headings, links, and form controls. Verify that text is read in a logical order, images have meaningful alt text, buttons and links are clearly described, and dynamic content is announced properly. If information is confusing when read aloud, accessibility improvements are needed.
- How can I check if a website is accessible?
You can check if a website is accessible by combining automated accessibility tools with manual testing. Review keyboard navigation, colour contrast, image descriptions, form labels, and mobile usability. Testing with assistive technologies such as screen readers provides the most accurate insight into real accessibility.
- How do I test a webpage for accessibility?
To test a webpage for accessibility, begin with an automated scan to catch obvious issues. Follow this with manual checks for structure, navigation, and readability. Finally, test key user flows using a screen reader and keyboard-only navigation to confirm that users with disabilities can complete tasks successfully.
Conclusion
Learning how to check the accessibility of a website is a critical skill for modern digital teams. Accessibility checks help identify barriers early, improve usability for all users, and reduce long-term compliance risk.
By combining automated scans, manual testing, assistive technology checks, and regular reviews, organizations can build a sustainable accessibility process. Starting with a free accessibility scan provides quick insight, while deeper checks ensure real-world usability.
Accessibility is not about perfection; it is about progress, consistency, and care for every user who visits your website.