1. How To Install
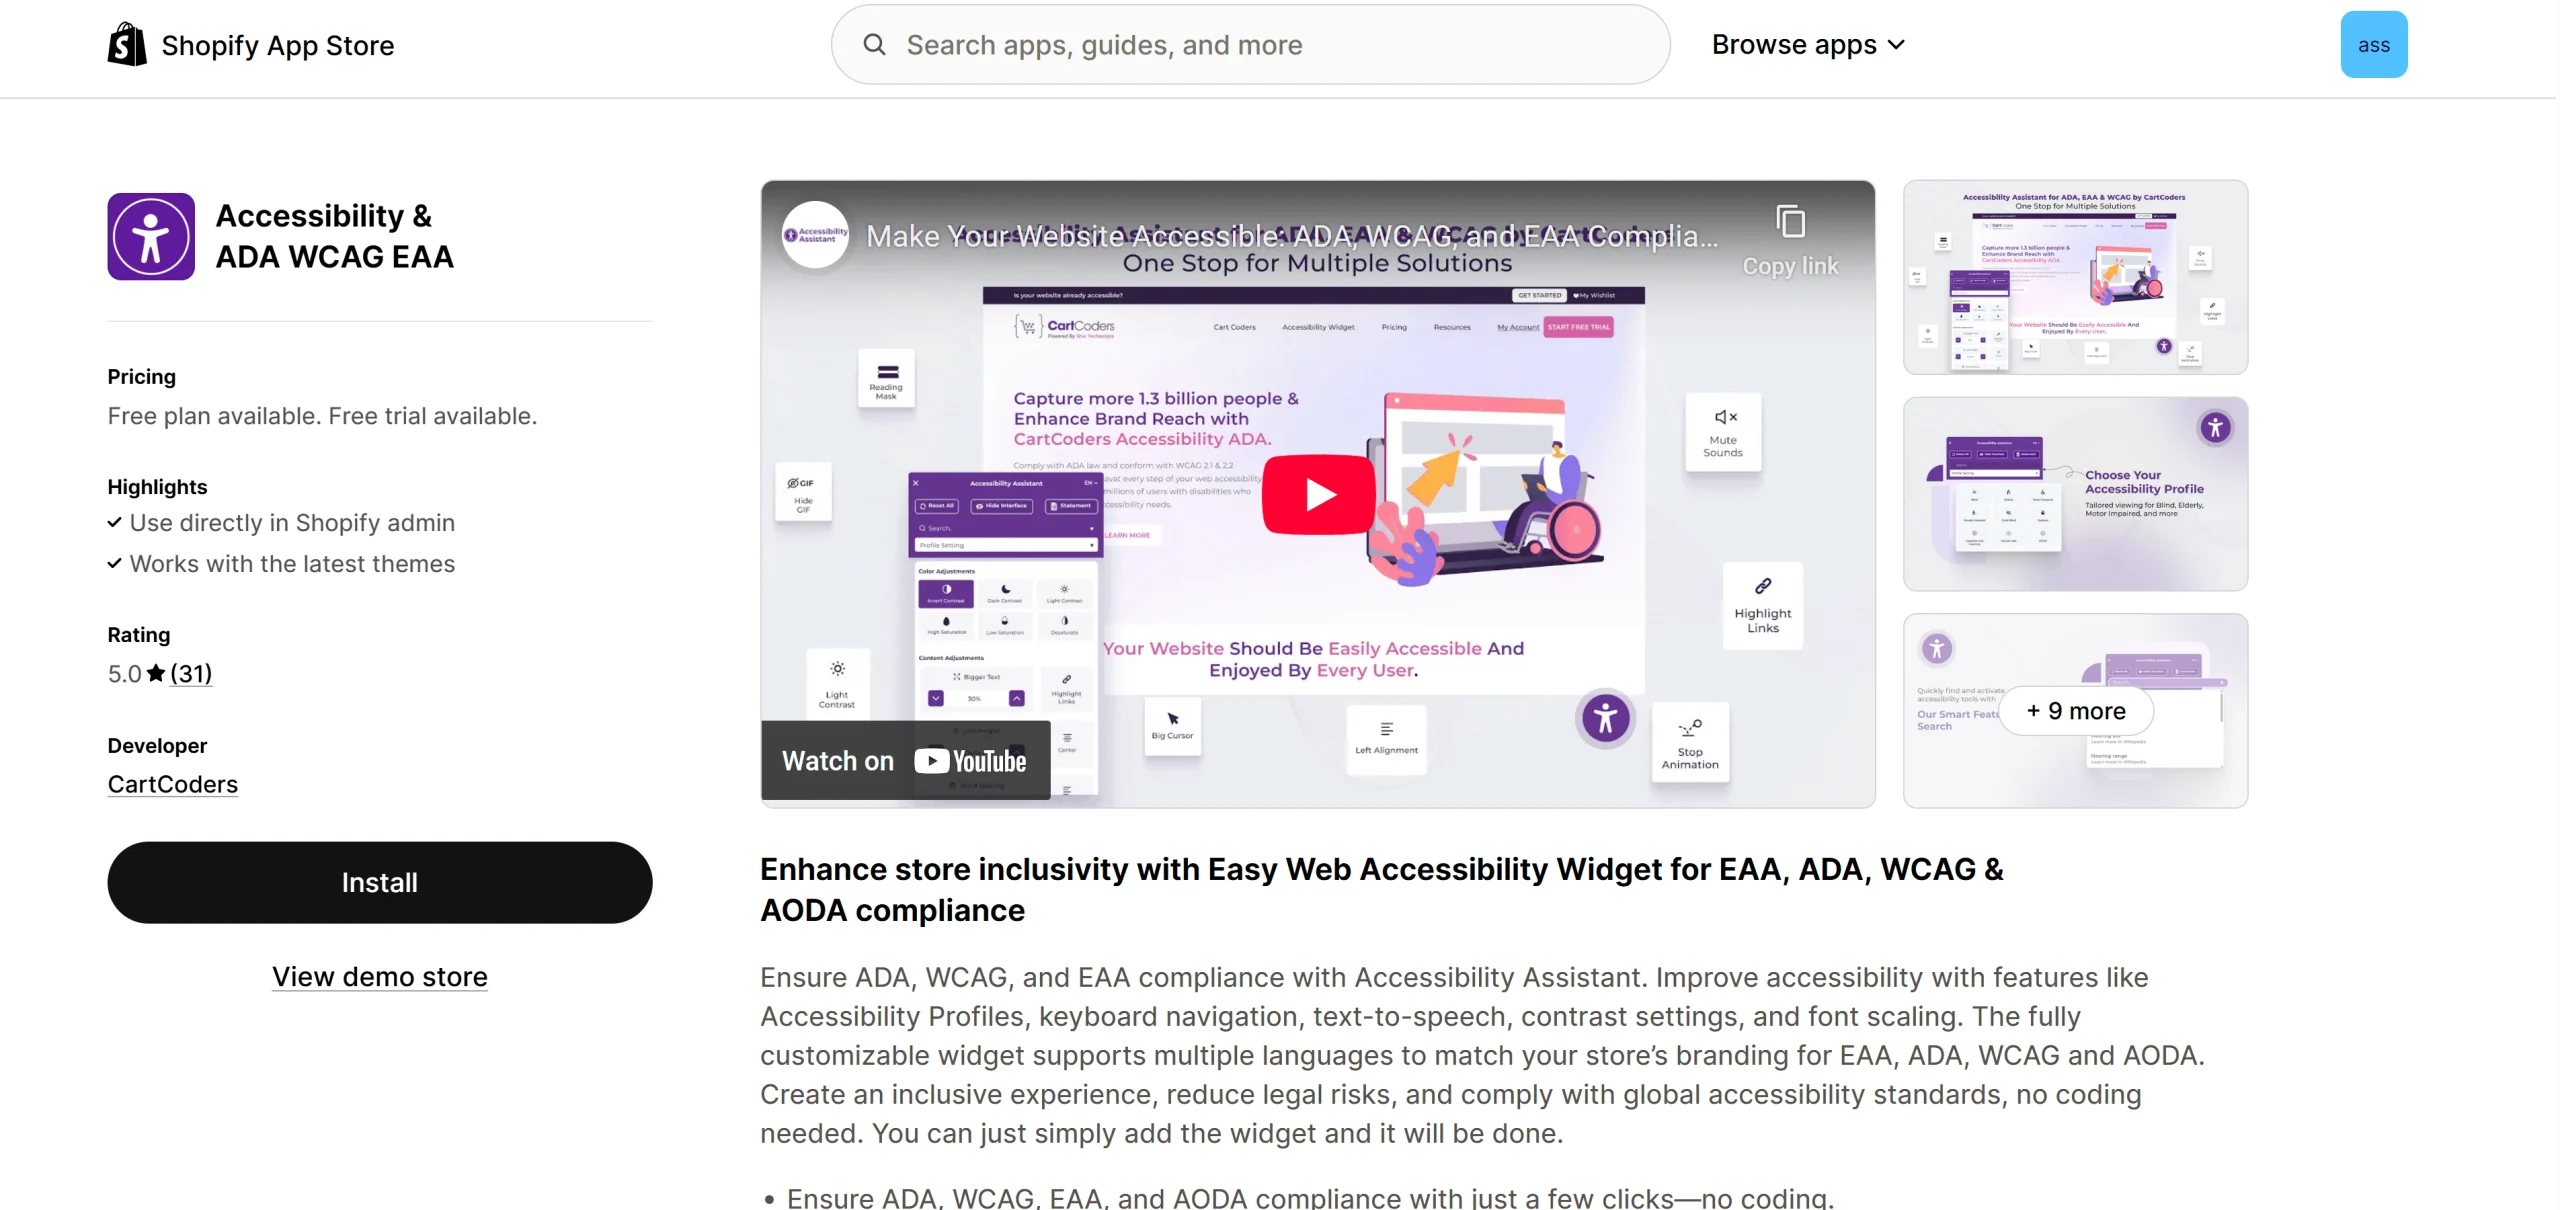
How to Install the App from the Shopify App Store
a. Go to the Shopify App Store.
b. Search for the App “Accessibility Assistant”.
d. Click “Add app”. You’ll be prompted to log in to your Shopify store if you aren’t already.
e. After logging in, Shopify will show the app’s permission request screen.
f. Click Install app .
g. Once installed, you’ll be redirected to the app’s setup page in your Shopify admin.
h. Follow the usage guide to configure it for your store.
2. Enable the Accessibly Assistant in Your Shopify Theme
a. Log in to your Shopify admin.
b. Go to Online Store > Themes.
c. Find the theme you want to edit and click Customize.
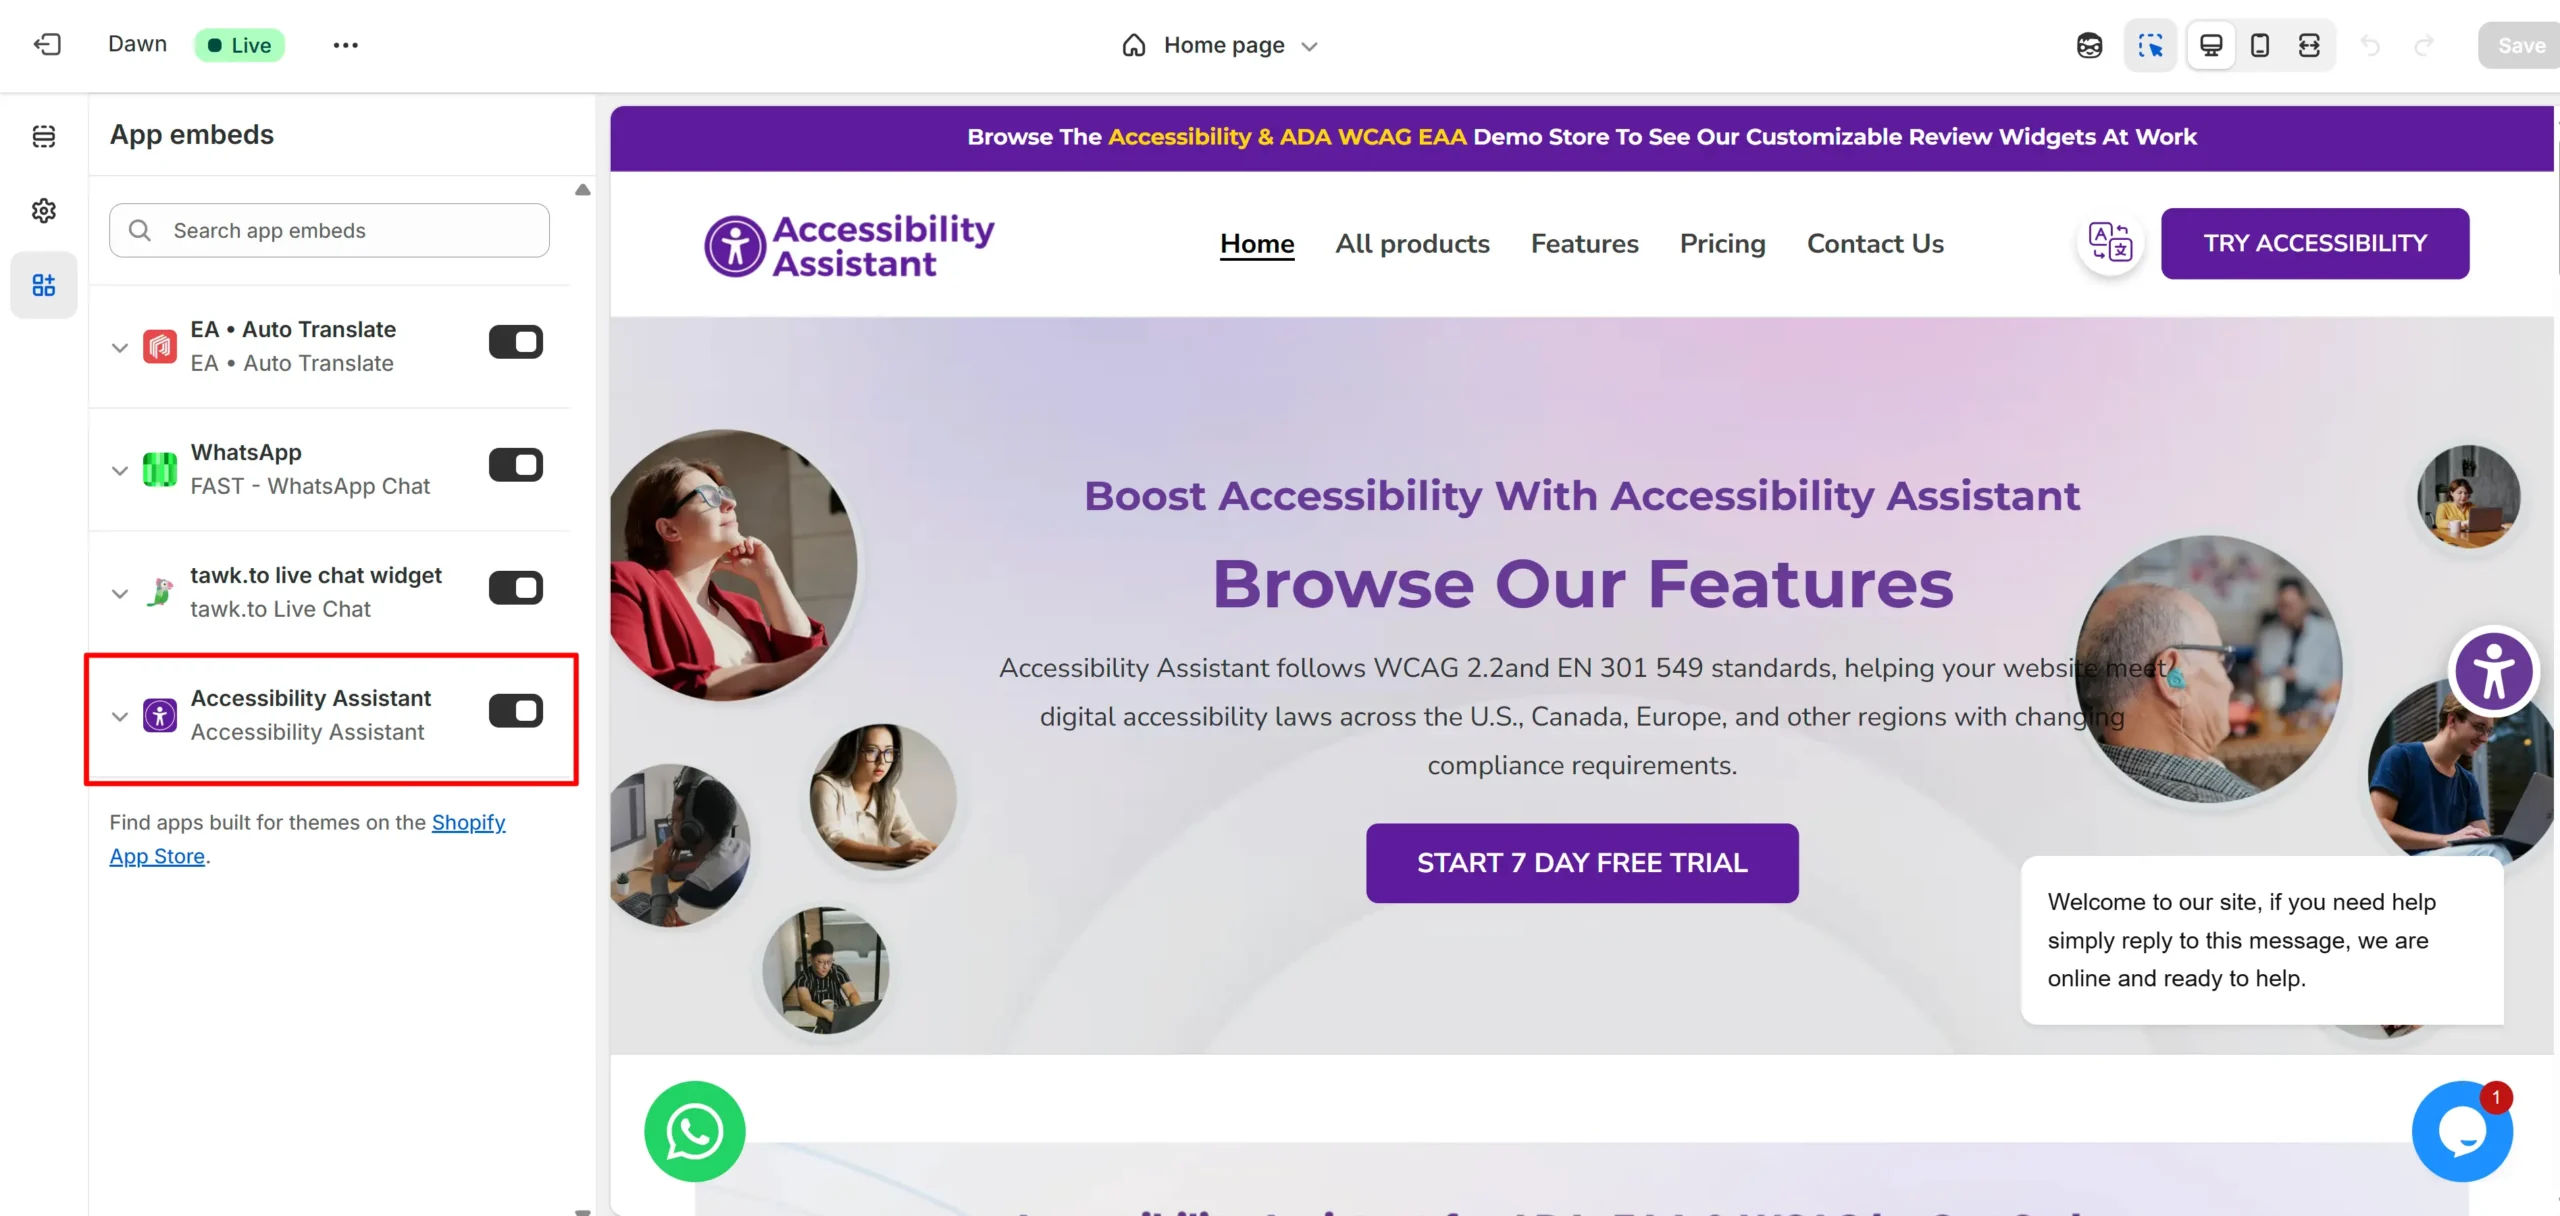
d. In the theme editor, click on the App Embeds icon.
e. Find Accessibility Assistant.
f. Toggle it ON to enable.
g. Click Save in the top right corner.
3. Overview
Accessibility Assistant is designed to make websites accessible to everyone, including users with visual, auditory, mobility, and cognitive impairments. Our mission is to combine innovation with social responsibility, ensuring every business can provide an inclusive online experience.
4. Select Plan and Offers
Select Monthly Plan:
Start by picking the monthly plan that suits your needs. Each plan offers different features and customization options. The plan you choose will determine which features you can access in the widget. Additionally, enjoy a free trial for 5-days to explore all the features and enhance your store’s accessibility.
Select Yearly Plan:
Choose the annual plan that best fits your needs. Each plan provides a variety of features and customization options. Your selected plan will determine the features available in the widget. Plus, take advantage of a complimentary year to explore all the features and boost your store’s accessibility.
5. How to Enable/Disable Widget
Customers will be provided with the option of accessing the plugin for accessing the advanced features. Through which the customer can enable/disable the functionality and access the application on his system.
1. How to Enable/Disable Widget
Customers can manage the widget visibility directly from the widget settings by enabling or disabling it.
2. How to Enable the Accessibility Widget and Add a Footer Link
a. Go to your Shopify Admin.
b. Navigate to Online Store → Customize to open the Theme Customizer.
c. go to App Embeds.
d. Find and Enable Accessibility Assistant.
e. Next, go to the App Settings and enable the “Do you want to put as link” option in the widget settings.
How to Add an Accessibility Link to Your Footer:
a. go to Online Store → Navigation.
b. Select the Footer menu.
d. In the Name field, enter: Accessibility Assistant
e. In the
Link field, paste this code:
#add-aacc-link
f. Click Add, then click Save menu.
6. Choose Design
The ‘Choose Design’ option empowers merchants to select from a variety of design styles for our widget, tailoring it to their unique preferences and needs
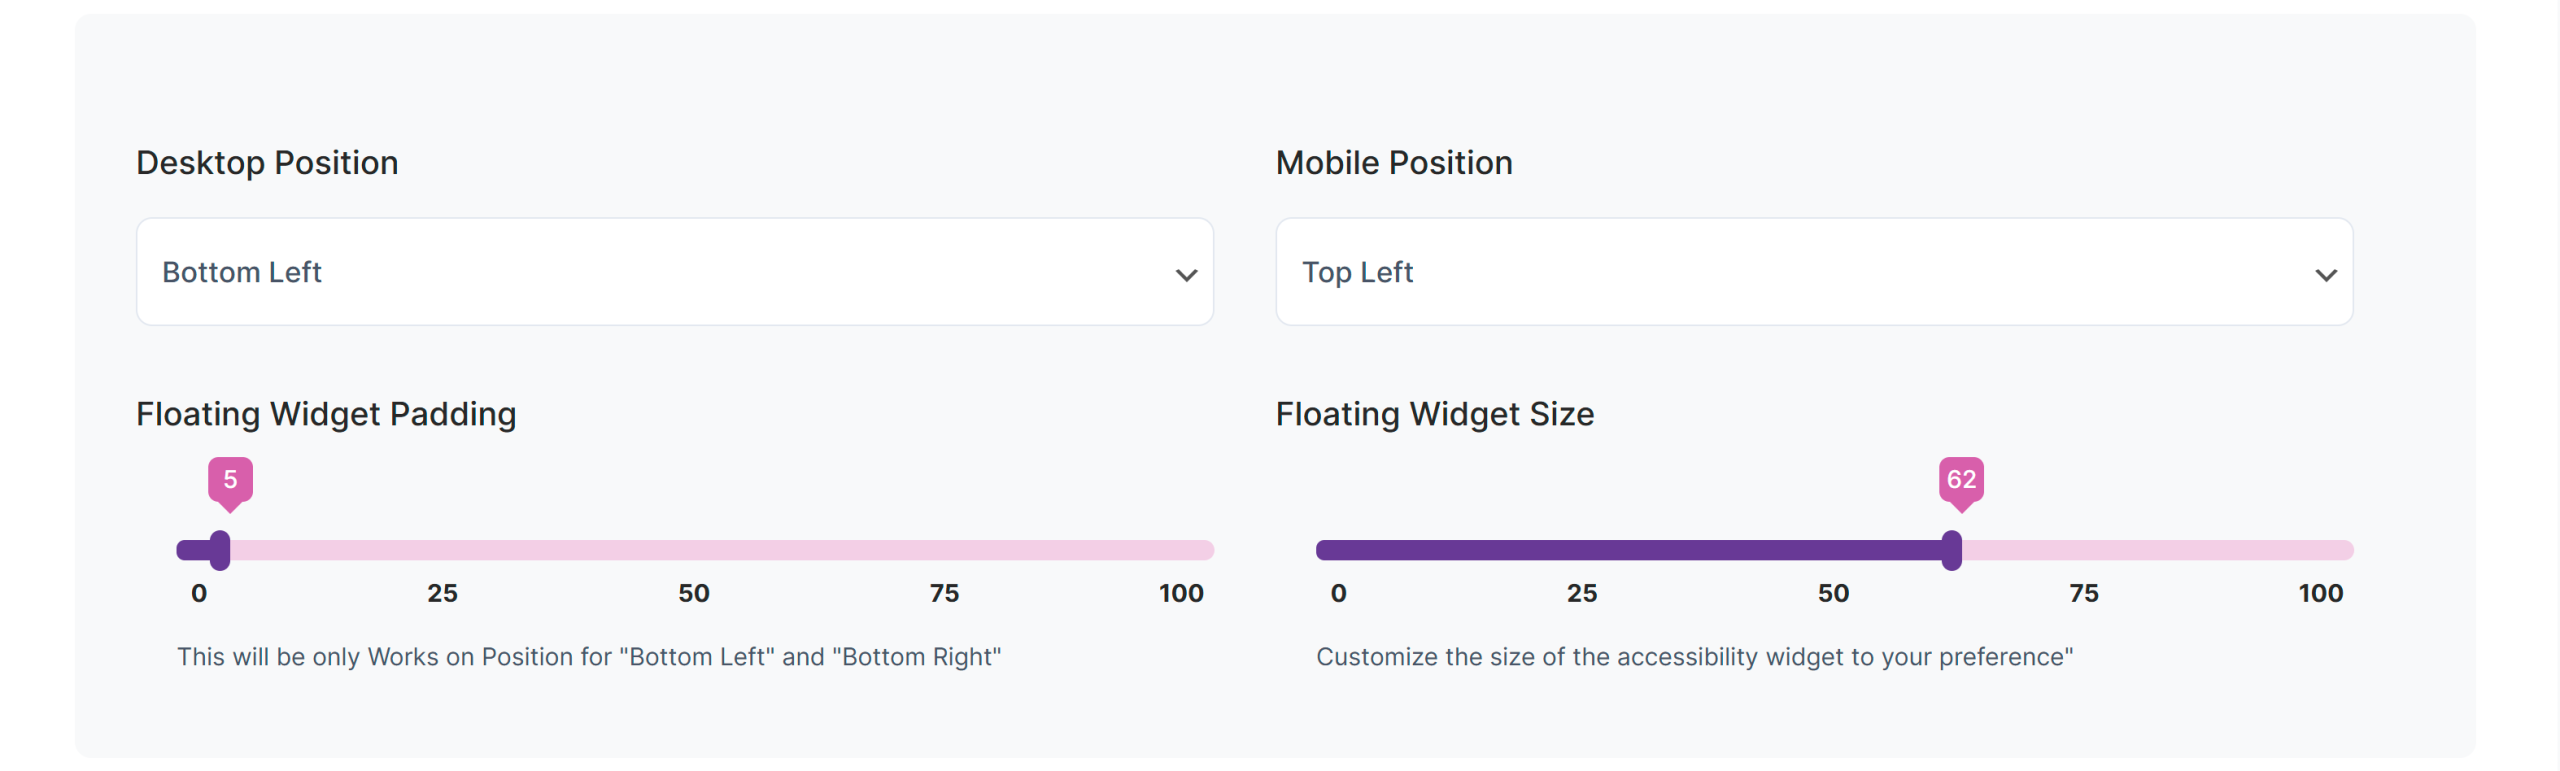
7. Customise Position
The ‘Customize Position’ feature enables merchants to tailor the exact placement of our widget, ensuring it perfectly fits their site layout and design vision.
- Desktop Position: Customers can set the widget position on desktop
(Top Left, Top Right, Middle Left, Middle Right, Bottom Left, Bottom Right). - Mobile Position: Customers can set the widget position on mobile
(Top Left, Top Right, Middle Left, Middle Right, Bottom Left, Bottom Right). - Floating Widget Padding: This will only work when the position is set to
“Bottom Left” or “Bottom Right”. - Floating Widget Size: Customize the size of the accessibility widget to your preference.
8. Features
Use the menu settings to turn features enabled or disabled.
Navigation & Input
- Keyboard Nav
- Highlight Links
- Image Alt Tooltip
- Alignment
- Adjust Background Colors
- Useful Links
- Voice Navigation
- Virtual Keyboard
Display & Media Controls
- Cursor
- Readable Fonts
- Stop Animation
- Image/Video Hide
- Mute Sounds
- Highlight Hover
- Talk & Type
- Disable Widget Sound
Content Customization
- Saturation Modes
- Focus Mask
- Word Spacing
- Text Speech
- Content Scaling
- Highlight Focus
- Color Blind Options
- Disable Report Problem
- Hide Statement
Visual Enhancements
- Contrast
- Bigger Text
- Title Highlighting
- Text Enhancer
- Letter Spacing
- Line Height
- Adjust Text Colors
- Adjust Title Colors
- GIF Hide
- Read Mode
- Big Black Cursor
- Profile Options
- Disable Branding
- Language Variable
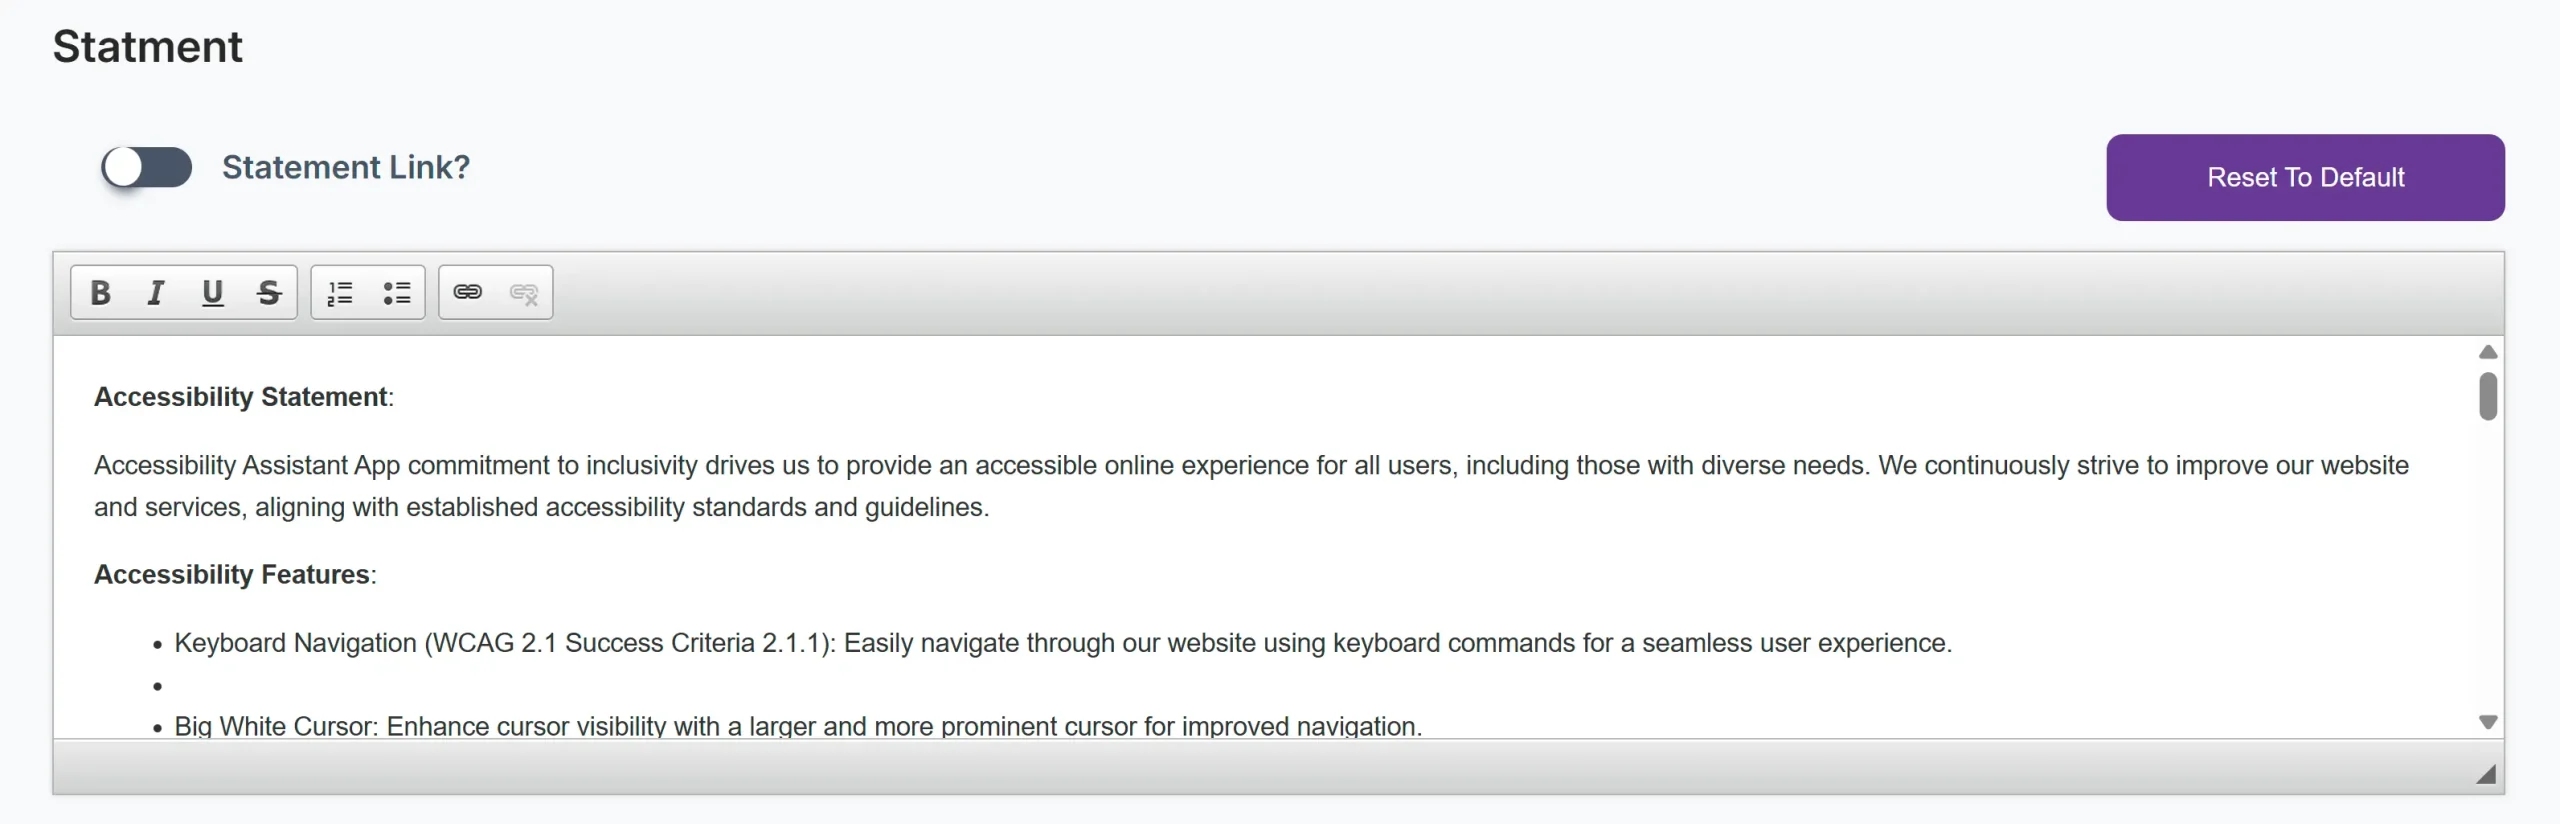
Statement
Customers can update the statement content or add a statement page link by enabling or disabling the statement link option in the menu settings.
9. Language Variable
The Language Variable feature allows your widget to automatically adapt to the language selected on your website. When enabled, the widget will detect and match the site’s active language – ensuring a seamless and consistent experience for users navigating your site in different languages. This is especially helpful if your store already includes a language selector, as it improves accessibility and ensures that the widget content is always shown in the user’s preferred language without any extra configuration.
Cutsomer can enabled or disabled this feature from the menu settings.
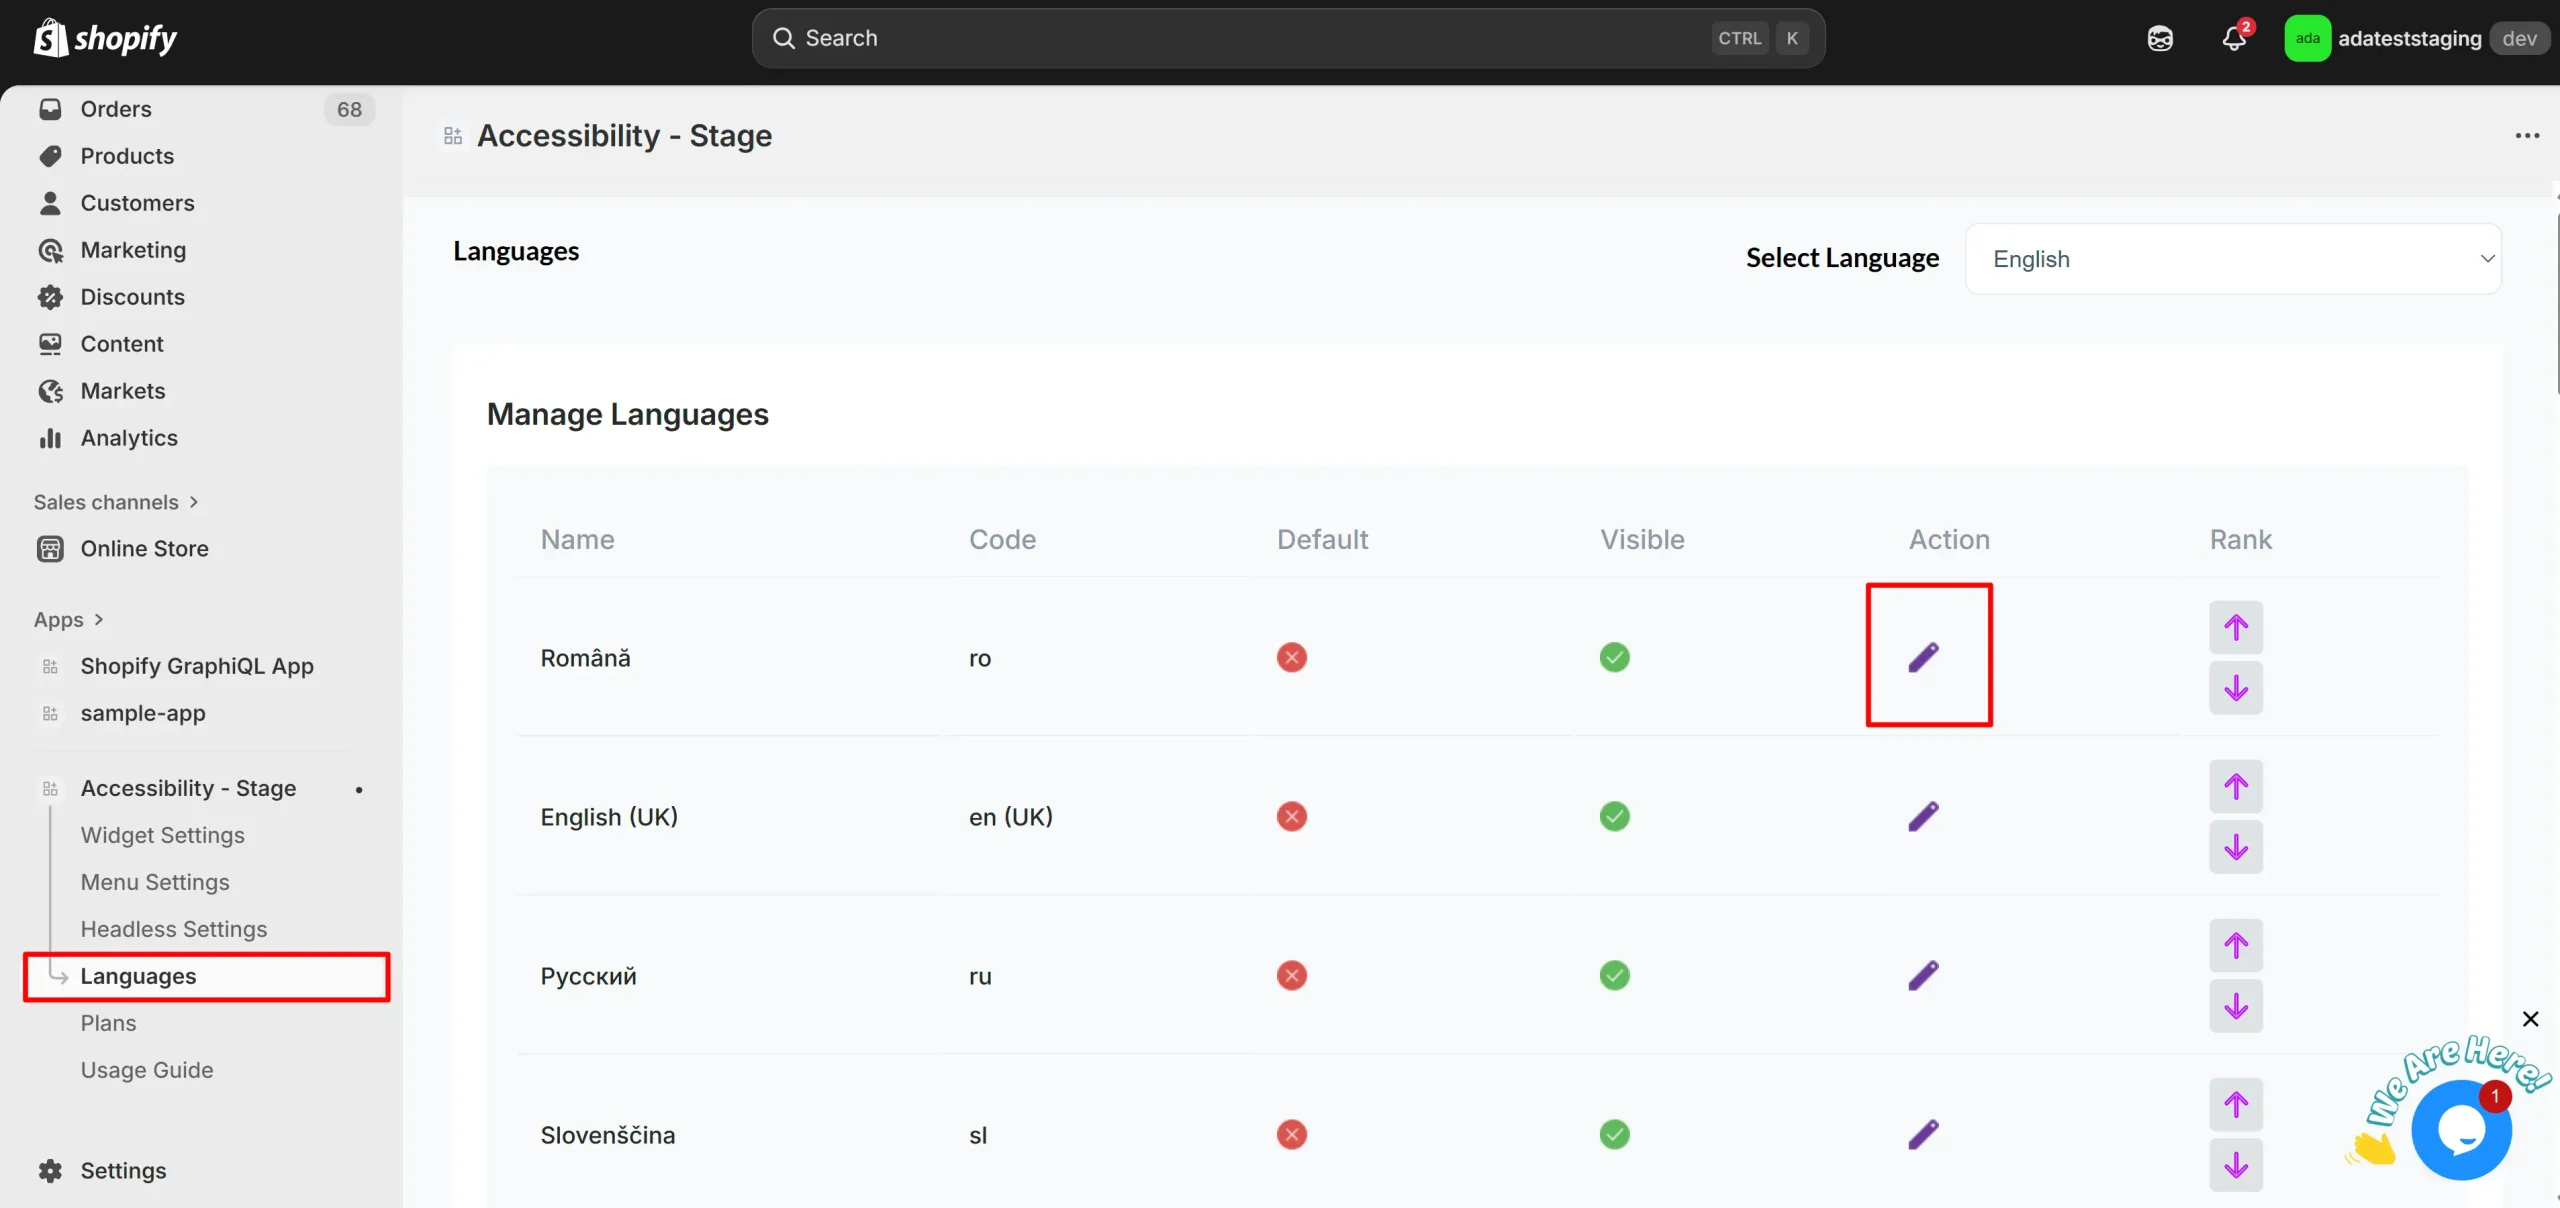
10. Language Sorting
The Language Sorting feature allows you to customize the order in which languages appear on your Language page and in the Widget. Simply use the up and down arrows beside each language to rearrange them according to your preference. Once you’re happy with the order, click Save Ranking to apply the changes. The languages will then appear in the same order across your storefront and Widget, providing a consistent experience for your users.
11. Editing Language-Specific Features
When you click the Edit icon, you will be redirected to a page where you can customize feature names for a specific language.
On this page:
- You can update the labels of accessibility features (e.g., Keyboard Navigation, Big Cursor, Reading Guide) in the selected language.
- These customized names will appear in the accessibility widget for users viewing the site in that language.
- This ensures all feature names are translated or adapted to your preferences, making the widget more user-friendly and consistent for your audience.
12. Ease of access to change the background/font color
Finally, access the settings to change the background and font colors. This step lets you personalize the widget’s appearance, ensuring it matches your brand’s style or enhances readability for users. Select your preferred colors and apply them to make the widget visually appealing and accessible.
13. Widget Icon & Color Customization
Choose Widget Icon
- You can select from a set of predefined accessibility icons for your floating widget.
- The chosen icon will represent the accessibility widget on your site.
Floating Widget Icon Color
- Outer Color: Customize the border or outer circle color of the widget icon by selecting a color or entering a hex code (e.g., #683996).
- Inner Color: Customize the background or inner area of the widget icon using a color picker or hex code (e.g., #F2F7FA).
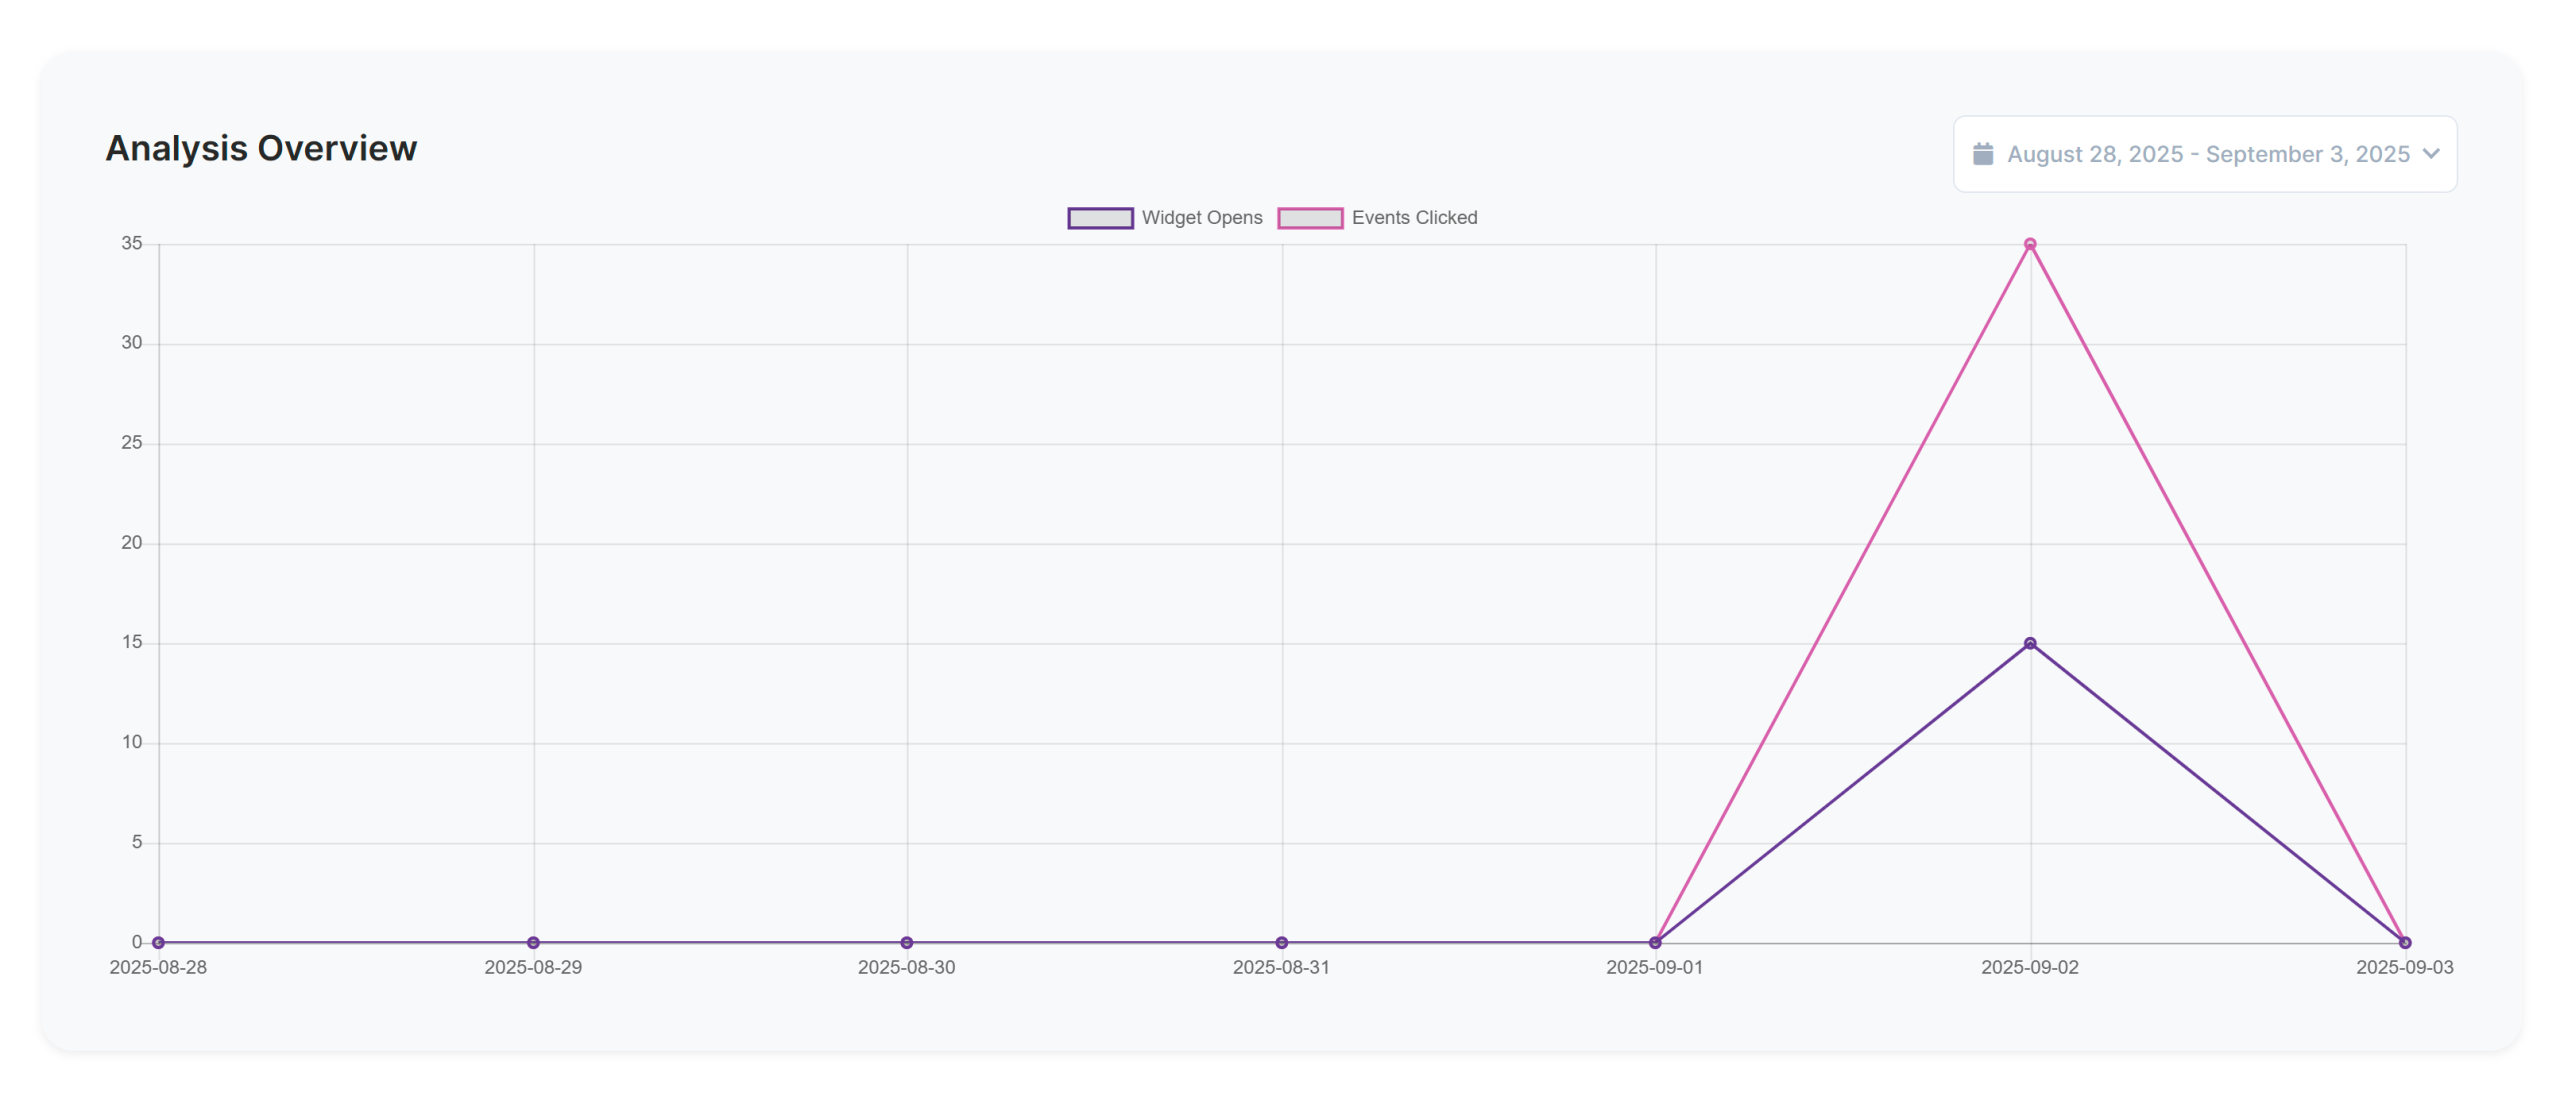
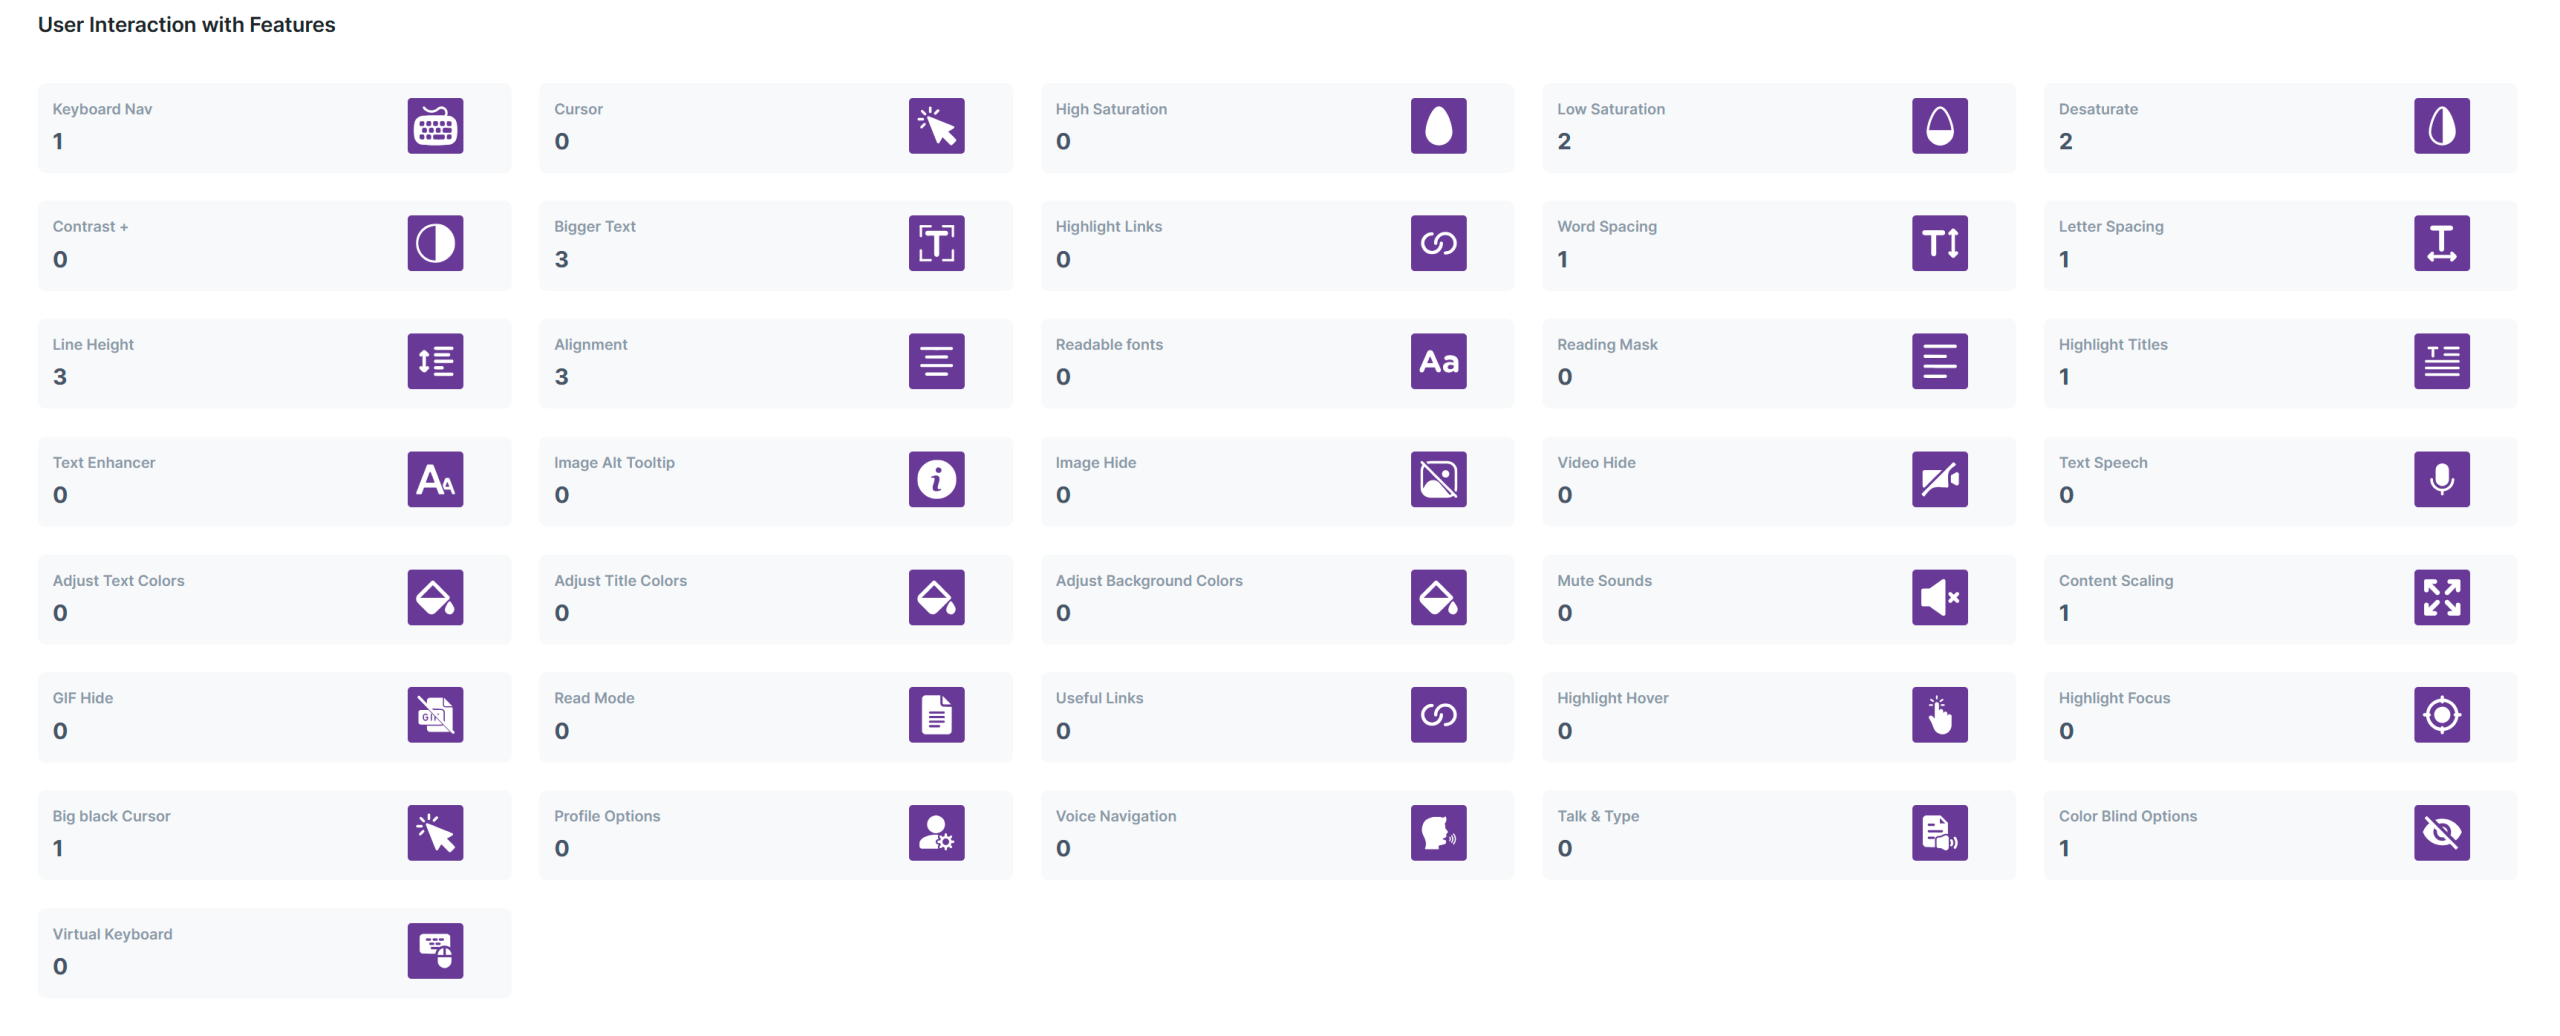
14. Feature Usage Analytics
On the Dashboard page, you can track how your audience interacts with the accessibility widget.
- Overview Metrics: View total widget opens, events clicked, and interactions at a glance.
- Most Used Features: See which accessibility tools (e.g., Bigger Text, Line Height, High Saturation, Useful Links) are used the most by your visitors.
- User Interaction Insights: Detailed breakdown of how often each feature is accessed, helping you understand which tools are most valuable to your audience.
15. Headless widget options
a. Navigate Headless Settings section.
b. In the Headless widget options box, you’ll see a script snippet like this:
c. Click the Copy button to copy the script.
d. Add the Script to Your Frontend. Paste the script into your main HTML layout file.


 Unlimited impressions and unrestricted widget visibility